


Even if your Android phone or smartphone has never given you problems, this does not mean that it cannot break at any moment!
Of course, we do not, of course, wish you to meet this unpleasant event but – as we know – prevention is better than cure. And, in this case, prevention means making a periodic and complete free backup of your data on Android. This is because in case you find yourself unable to recover or not be able to access such information (photos, contacts, messages, WhatsApp chats, etc.), the latter will always be recoverable in a few moments, at any time and in any place is found.
But how can you do?
Below, for you, we have selected the best free solutions that will allow you to make a complete backup of all your data stored on the Android smartphone and, therefore, be able to enjoy a better serenity in the management of your mobile device.
Let’s see them one by one in detail!
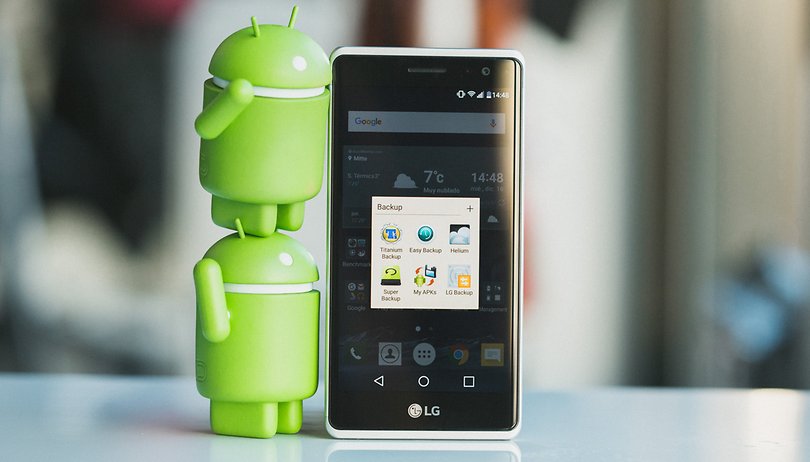
How to Perform a Full Android Backup (without root)
If you are fearing for your precious (and very expensive) Android smartphone, if you are about to change your Android phone model or think you are about to give up, then what do you do to secure all your precious personal data?
The good news is you’re almost there. You are about to learn how to store and protect forever all your information, all the applications and data generated by them and much more.
There are plenty of alternatives to save data and make an Android backup (without root and completely free), but in this sea of choice choices?
We tell you! Simple and fast solutions that do not involve any previous computer knowledge, you do not have to be a scientist or a space engineer to succeed, indeed, far from it!
You will finally say enough to the risk of losing your text messages, contacts, videos, photos, calendar appointments and all that is saved in the external memory of your Android smartphone.
Helium
Let’s start with Helium, one of the most simple and free solutions to create a complete backup of your Android that we wanted to reserve for your needs. (You can also proceed with a super-fast recovery of all the apps after configuring your new Android smartphone)
It is a well-known and widely used app (more than a million installations have already been installed) that can work without permissions or root rights. What does this mean?
That all users who have not yet “unlocked” their Android device can take advantage of all the features by simply connecting their smartphone to their personal computer and installing a Chrome extension on their PC.
Those who have the root can avoid going through this intermediate procedure, and use the app directly without having to connect the smartphone to the personal computer.
Having clarified the above, let’s now see how to perform an Android backup without root permissions through the Helium app.
The app is available in a completely free version that allows you to save and restore your applications on the Android device. Not all apps can be restored though: it simply depends on the manufacturer of the application and, therefore, it is still necessary to understand whether the developer has granted permission to such an activity.
A paid version is also available (costing less than 4 euros) which allows you to transfer apps from one device to another and restore backups made in the cloud.
As far as its operation is concerned, if your Android smartphone has the root it is obviously much more intuitive, considering that it will be sufficient to download the app on your smartphone and run it.
If, on the other hand, you don’t have root, you need to go through a few more steps, which, however, shouldn’t make it too much difficult to reach your goal.
How to make an Android backup without root permissions through the Helium app
- First download Helium from PlayStore and install it on your smartphone
- So, download the drivers for your smartphone and install them on your personal computer (if you have previously installed the official suite (such as Kies) to manage your Android smartphone, you probably won’t need them as they are already present)
- Open Chrome on your personal computer and install the dedicated Helium extension
- Once this is done, start Helium on your phone and follow all the instructions that appear on the screen. It is not very complicated: the app will ask you to log in with your Google account and then enable USB debugging and finally set the PTP connection mode
- Finally, open the Helium app in Chrome, connect the smartphone to the PC and accept the activation of USB debugging on the smartphone itself.
At that point, you will be ready to back up all the data on your Android phone at any time by choosing to save everything on an internal memory, on an SD card or on a cloud service such as Google Drive. In case you want to restore the backups, go to the recovery tab and select which backup you want to use.
Titanium Backup
In addition to Helium, the second most popular app for backing up Android applications is Titanium.
The operation is similar to Helium, and the business model is similar to the latter. In fact, we have the possibility to use a first app completely free of charge.
This will allow you to make all the backups of the Android data you want, and a second app that costs a little less than 6 euros, which in addition gives you some support for cloud services, as well as the ability to restore previous backup apps without having to do it manually.
Now, it’s hard to say which of Helium and Titanium could be the best app for full data backup on Android. Our suggestion is to install them and try them both, at least in the free version, and try to figure out which one might be easier to configure and use depending on your needs.
In this comparison, however, keep in mind that Titanium Backup can only be used if you have root permissions.
Therefore, if you have not done so to unlock your smartphone through root, you will not be able to use it.
Having said that, using the app is very simple.
How to make an Android backup (with root permissions) through the Titanium Backup app
- Once you have downloaded and installed the app that you can find on the Play Store, click on the icon of the sheet with a check (located at the top right) and then select the Backup of all the apps and system data
- Choose the destination folder either in the internal memory or in the SD card on which to save the data in the appropriate section (which you can find in Menu> Preferences> Backup folder path) and start the backup process
- If you want to do the reverse path, and therefore want to restore the files and apps, always press the icon with the sheet and the check mark and then select the function you want.
Easy Backup & Restore
Let’s take another step forward in our guide on how to make a complete backup of data in Android.
In fact, if you are not particularly interested in backing up applications but are more than anything else only interested in saving all your SMS, contacts, calendar and calendar data etc. (in short, “your” data), you can try the excellent Easy Backup & Restore .
It is an application – obviously – free, extremely simple to use, which will allow you to save messages, call history, phonebook, calendar and all your personal data on the phone’s internal memory, on an SD card or on a cloud storage service.
To work, unlike Titanium, it does not require root.
Even if you should not have any difficulty in its use, we remind you that to be able to use it, after having installed it, you will have to press the Make backup button. The app will ask you which elements you want to include in the backup: once you have selected them all (or, at least, those you are interested in) press OK and choose the preferred save destination.
If you want to restore the data, no problem. All you need to do is in fact access the app, select the recovery item, identify what data to restore and confirm the operation.
Easy, isn’t it?
Data backup on Android with Google
Of course, in addition to the solutions mentioned above, you will be able to perform a complete backup of your Android content ( data and settings) also through Google services.
You can therefore choose to create backups thanks to the services that the large G makes available to you and then restore the backup data on your original device or on any other new or subsequent Android device (the latter option is particularly useful if you have permanently lost or destroyed your original device).
Be careful, however, not to fall into the temptation of conserving this recovery compatibility excessively. The backup your Android data (or rather its recovery) varies in fact based on the device and version of Android that is installed on the device. In other words, you cannot restore a backup of a later version of Android to a device that has a previous version installed.
But why, then, should you prefer the aforementioned apps instead of backing up with Google? Would it not be better to rely on the “official” backup of Google, Android developer, rather than resorting to third-party services?
In fact, it depends a lot on your preferences. In principle, resorting to Google services is a bit more complex, given that you won’t have to use a single tool – as instead happens with the apps mentioned above – but many tools, in part partially manual. Any examples?
- If you want to backup photos and videos on your Android, you must use the Google Photos collection by following these instructions (select the Android tab)
- If you want to back up content, you can manually upload files and folders to Google Drive, following these other directions (select the Android tab)
- If you want to backup data and settings, thus protecting the data you have backed up, you will need to use a PIN, a sequence or a password for the lock screen. To do this, go to Settings, and then to System> Advanced> Backup, activating the relevant service.
In short, as you can well imagine the path is a little more complex than the above we have been able to explain. However, it could be the best solution if you want to make a selective backup of Android data, with only specific contents, rather than making a massive backup of everything on your device.
However, if you want to follow this path, here are some useful information:
How to Backup Android Data with Google Services
The first thing to do is certainly to use the Google Drive app with which you will be able to backup your data for free.
- Download the app from the Google Play Store
- Go to Settings
- Select the menu item Backup and Restore
- Enable the Backup function on Google Drive and click on Backup now
You have 115 GB free available, shared with Gmail and Photos. Besides, you will have to pay a small subscription of a few euros a month.
Next, we recommend using Android Backup Service, which you can sometimes find active by default. With this option you can save data and settings (from Google Calendar to passwords, from backgrounds to display settings, etc.), rather quickly.
- Go to Settings and then Backup
- Then proceed to Backup Google by checking that the entry is enabled
- In Settings and then on Account – Google ticks all the items for which you are interested in creating a backup
For photos and videos the best way is certainly to use Google Photos. Download it here from the Play Store and then go to Settings> Backup and sync. Set the upload size and enable the item Backup and synchronization. Once the backup is complete, you will be able to delete the uploaded files or not, in order to free up space on the device.
If you want to save your progress with the games that are on the Play Store, you can do it by integrating this option on the Google Play Games platform, which you can find here. Go to Settings and then enable the items automatically log in to games and Sign in with this account. In this way, Play Giochi will automatically synchronize with each new game installed.
Finally, we conclude with a nod to the music files. In this case, the official way to create backups is to use the Google Music Manager app. After downloading Play Music, open the Music Manager and choose the path from which to take the media files. Once done, start the synchronization: they will be automatically coordinated with what is present in the Play Music app of your smartphone.
Conclusions
We hope that these brief indications have been useful to you to be able to make a good Android backup. And you, what solution did you choose to secure and perform a full Android backup? Doubts, curiosity or what error to report? Write it in the comments. We will be happy to answer all your questions about this, with direct feedback or a new analysis!